Best way to perform OLM to PST conversion for free
The blog will help you to safely convert OLM files to PST format without worrying about data alteration. We’ll discuss the OLM to PST conversion process and will suggest you the most convenient and reliable way to migrate OLM to Outlook PST without any risks.
Microsoft provides its Outlook email client not only for Windows but also for Mac. There is the only difference between the data files format used by these two applications to store and save the mailbox content like emails, calendars, contacts, events, journals, to-do lists etc. You must be familiar with the PST ( Personal Storage Table) file format which is used as an Outlook data file by Windows. But, some users may not aware about what file format does Outlook uses in Mac. The answer is the OLM file format. The Outlook stores the mailbox data of users in OLM file format in Mac.
But, the thing you have to keep in mind that there is not any way to open OLM file in any Outlook version of Windows. Windows Outlook supports only PST and MSG file format. However, you can import the OLM file from Mac Outlook to Windows Outlook. But, it should be done with utmost care and in the right way otherwise, it may lead to corruption in these files and may severely affect the data stored in it. So, in this write-up, we’ll discuss the right approach to export to PST file format from OLM format for free.
Why there is a need for OLM to PST conversion?
Before I discuss how to import mail items from Outlook for Mac to Outlook PST in Windows, let’s have a look at the reasons for this conversion.
- If previously you were using Outlook on Mac, but, due to some reasons, you have to switch to Windows Outlook. In this scenario, you need to export OLM file to PST file format for free.
- If you have received an OLM file from someone, but unable to view and open it on your Windows Outlook. In this case, you need to convert OLM to Outlook PST to view the data contained in the OLM file.
Manual techniques for OLM to PST Conversion
The conversion Outlook for Mac to Windows Outlook using manual techniques involves four main steps which have to be performed one after the other. The steps are:
Step 1: Create an IMAP account using Gmail account
- First, open the Gmail account and click on the Gear icon on the top right side.
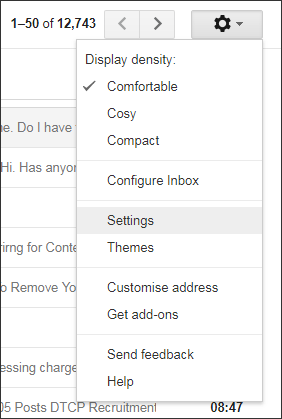
- Hit a click on Settings button.
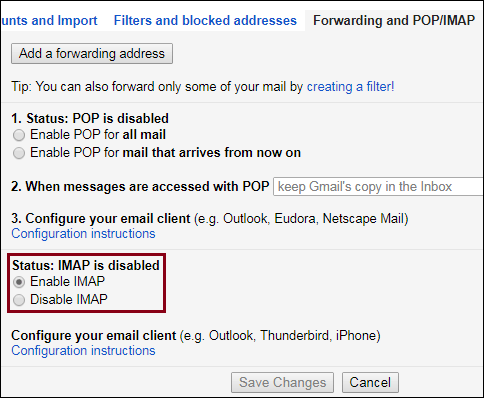
- Under the Settings tab, click on the Forwarding and POP/IMAP tab.
- Now, you need to check the IMAP Access status. If it is disabled, enable it.
Once you create the IMAP account, you need to set up the Outlook for Mac. For doing this, go through the below steps:
Step 2: Configure IMAP mail account and Outlook for Mac
- At first, open the Outlook for Mac and then navigate to Menu ->Tools -> Accounts.
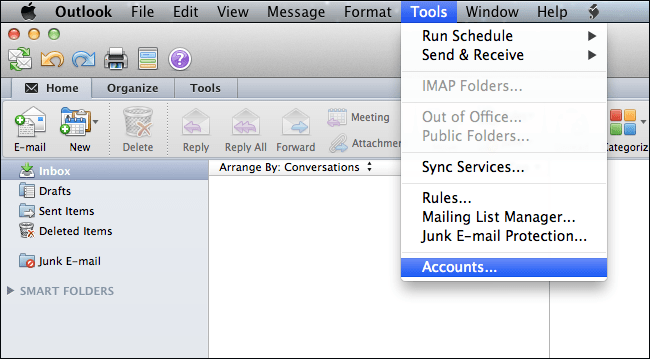
- Hit a click on Email option.
- Now, enter an email address, password and other information which has been asked. After that, select the Add Account option.
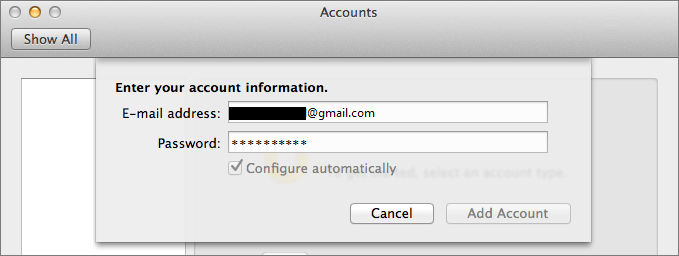
- After the completion of the above process, check the status of the IMAP mail account.
Now, you need to create a Gmail label so that there is a sync between IMAP account and Outlook for Mac. Follow the below steps for this.
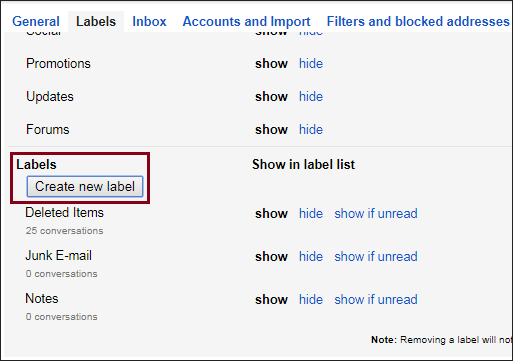
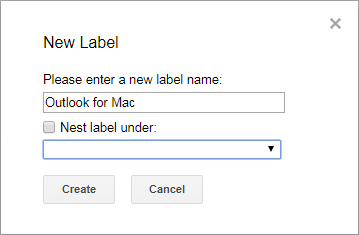
Step 3: Create a Gmail Label
- Again, open your Gmail account. Go to the gear icon on the top right corner of the Gmail account and after that select the settings option.
- Now, under this tab, click on Labels and then on Create a New Label. Also, click on the checkbox of IMAP.
- After this, move to your Mac Outlook and click on the Send/Receive button.
Now, we’ll move the mailbox content from OLM to IMAP mailbox folder. Go through the below steps.
Step 4: Migrate emails from Outlook for Mac to IMAP mailbox
- Open the Outlook for Mac. Now, right click on the mailbox data which you want to transfer to Windows Outlook.
- After that, select the Move option and Copy to Folder.
- Now, mention the name of your IMAP folder and hit a click on Copy option.
- Then, refresh the Gmail folder to update the mailbox or click on send/receive.
- Now, all your copied mailbox contents have been synced to IMAP mailbox.
Major Drawbacks of Manual method
- Should be done with utmost care as a minor mistake may lead to data loss and corruption. So, it is advised to have a backup of OLM file.
- Very long and time-consuming process. Also, requires sound technical knowledge.
- Not effective for corrupted OLM files.
Professional OLM to PST Converter
As explained above, the manual method requires a proper attention and utmost care for importing the OLM files to PST file format. If not done properly in the right way, it may lead to the data loss and corruption of data. So, it is recommended to use a free OLM to PST converter for the successful OLM to Outlook PST conversion. This is one of the most convenient and reliable tools which imports OLM file to Outlook PST. It enables the users to open and view OLM data file for Mac Outlook in Windows Outlook keeping all the data intact. Unlike the manual technique, it converts OLM files even if they are in a corrupted state. You can also save the OLM to other formats such as MBOX, EML, and MSG apart from PST file format.
Verdict
In the write-up, all about the OLM and PST have been explained. Also, the manual as well as automated methods to import the OLM from Outlook for Mac to PST from Windows Outlook. The final verdict comes out to be that it is wise to use the best OLM to PST converter online to export the OLM file to PST in an effective way.